Drawing Arcade

General Project Details
Role:
User Experience(UX) Researcher, 3D Modeller
Team Members:
Janice Wang, Sean Do, Vy Nguyen, Brandon Lau, Eric Tzu
Tools:
Figma, Blender, Photoshop
Elapsed Time:
12 weeks (September 2024 - December 2024)
Goal:
Investigate and create an interactive concept for a problem space a client is facing.
Overview
The Drawing Arcade is an interactive concept my team and I developed as the term project of a course on interactive design methods for our client, the small, event-driven business Draw Around Vancouver. The concept, seen in Figure 1, was for a new class featuring a non-linear structure and different stations for teaching different drawing fundamentals to create a social and non-judgmental learning environment for beginner artists. My most prominent contributions during this project were completing field research for a design ethnography and creating the 3D model used to communicate the concept.
Field Research
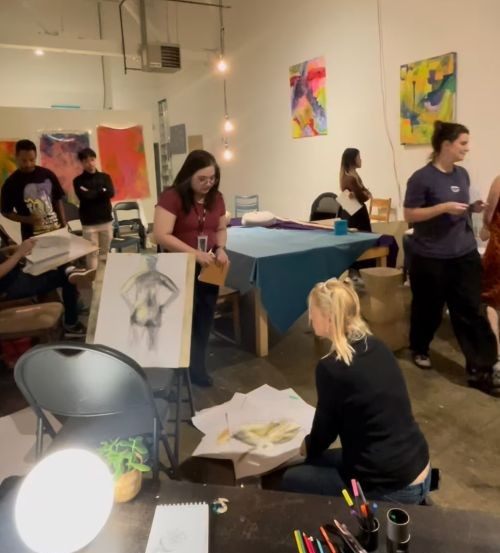
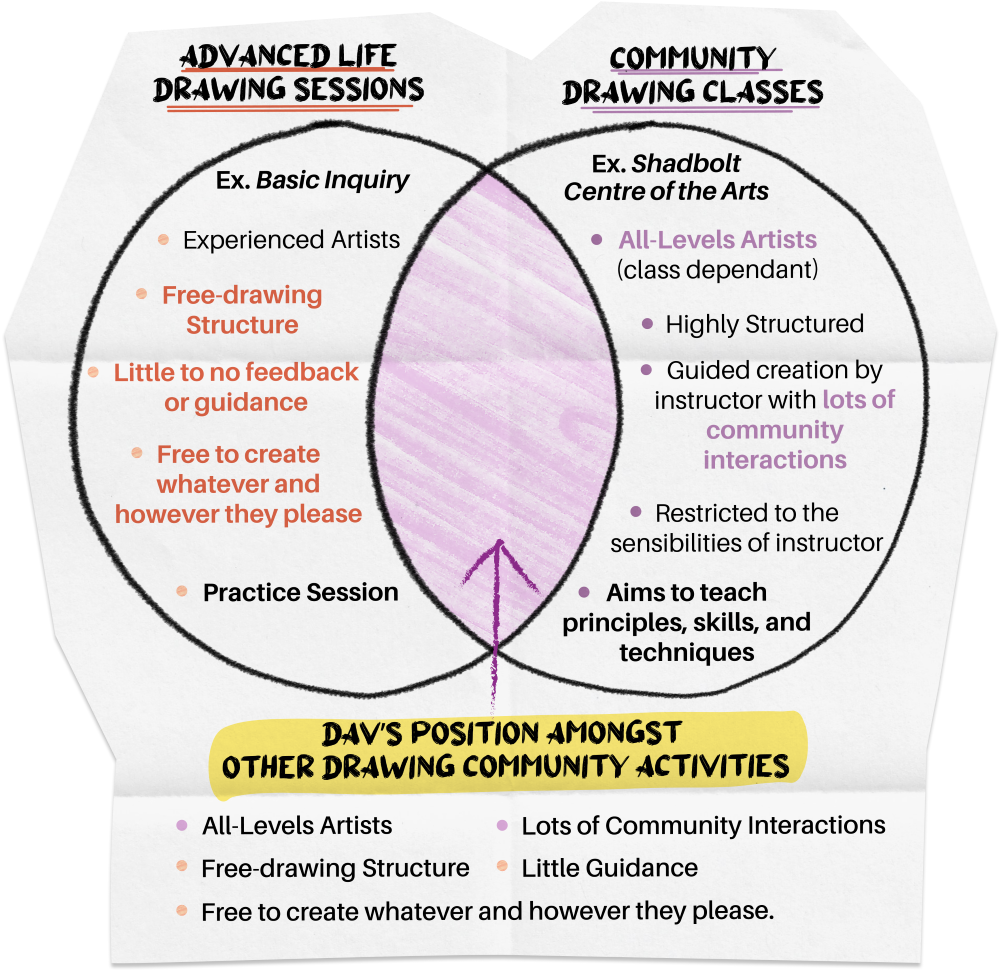
During the early phases of the team's research, the participants at our client's events, we collected a lot of qualitative data through field research at these events, using ethnographic methods such as interviews and observations. In this process, I attended 3 events, like the one seen in Figure 2, conducting interviews with 6 participants and noting observations used to identify potential issues to address in the design intervention. In addition to research in person, I gathered the sentiments and recommendations online about the client's target audience and art communities, to understand their position among similar services (Figure 3). The combined research was used to inform the creation of other UX visualization documents that helped the team ultimately isolate an issue and develop interactive solutions.
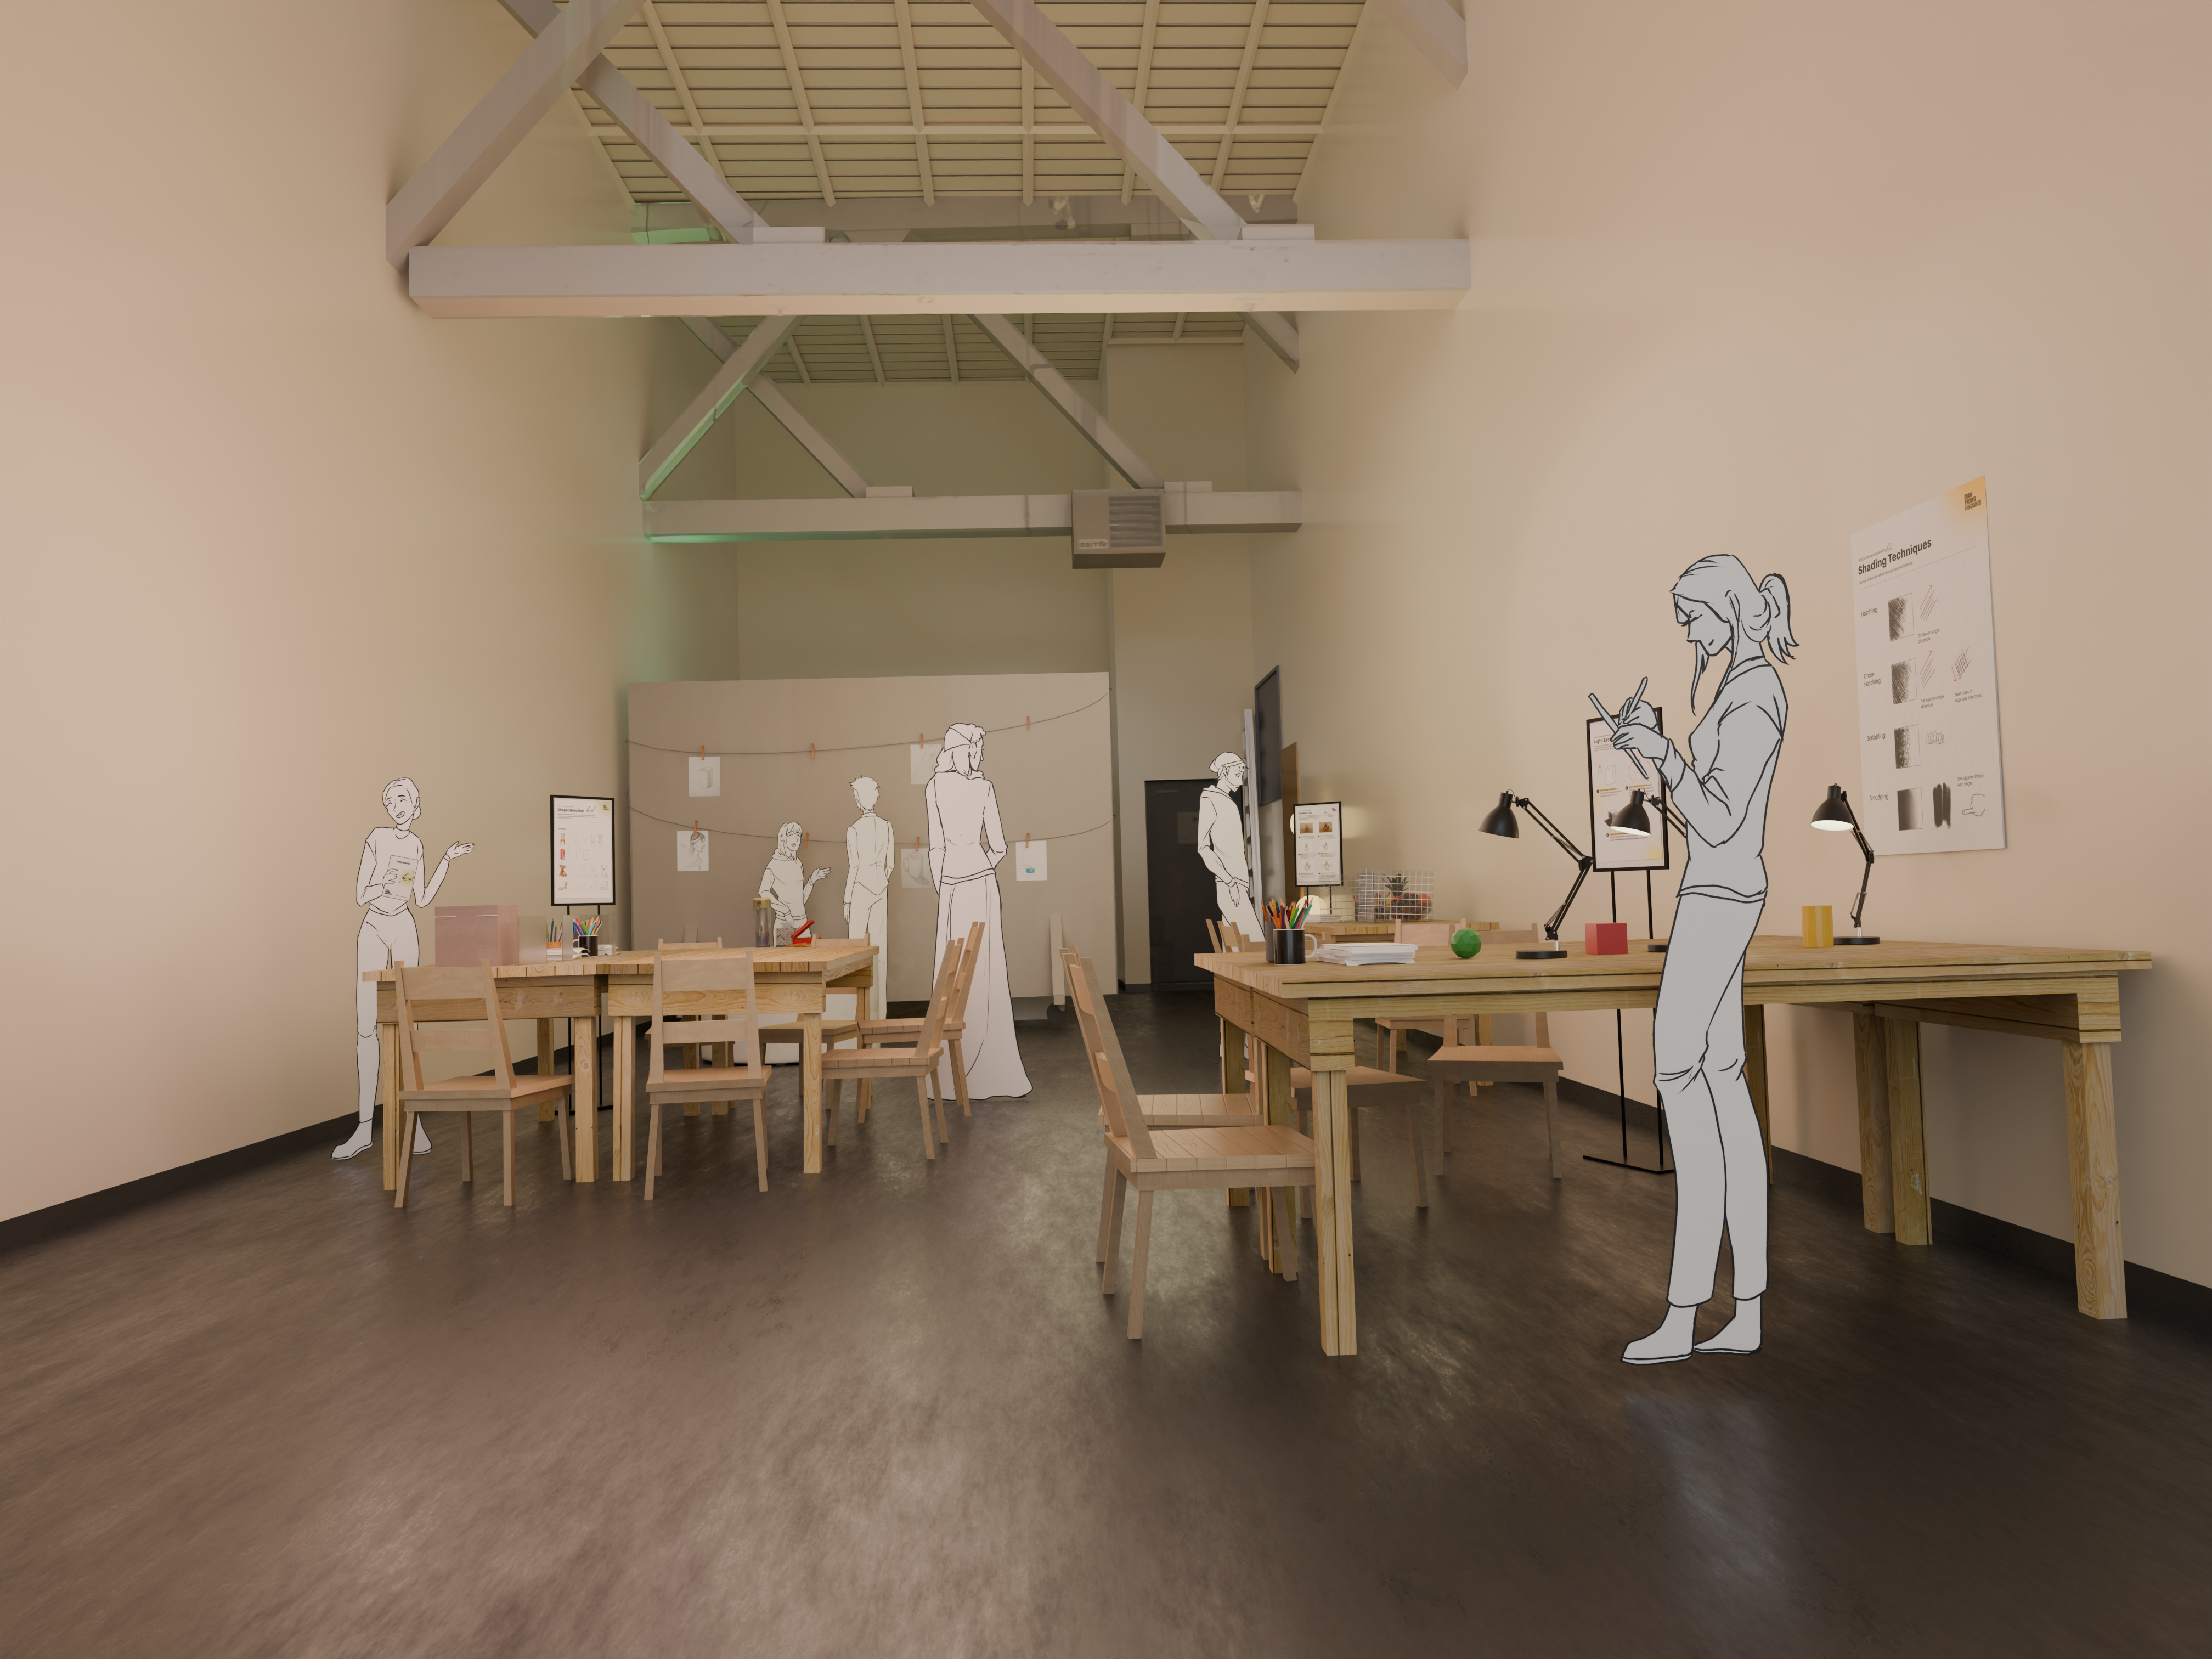
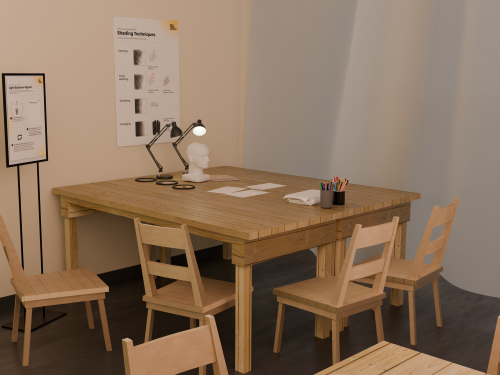
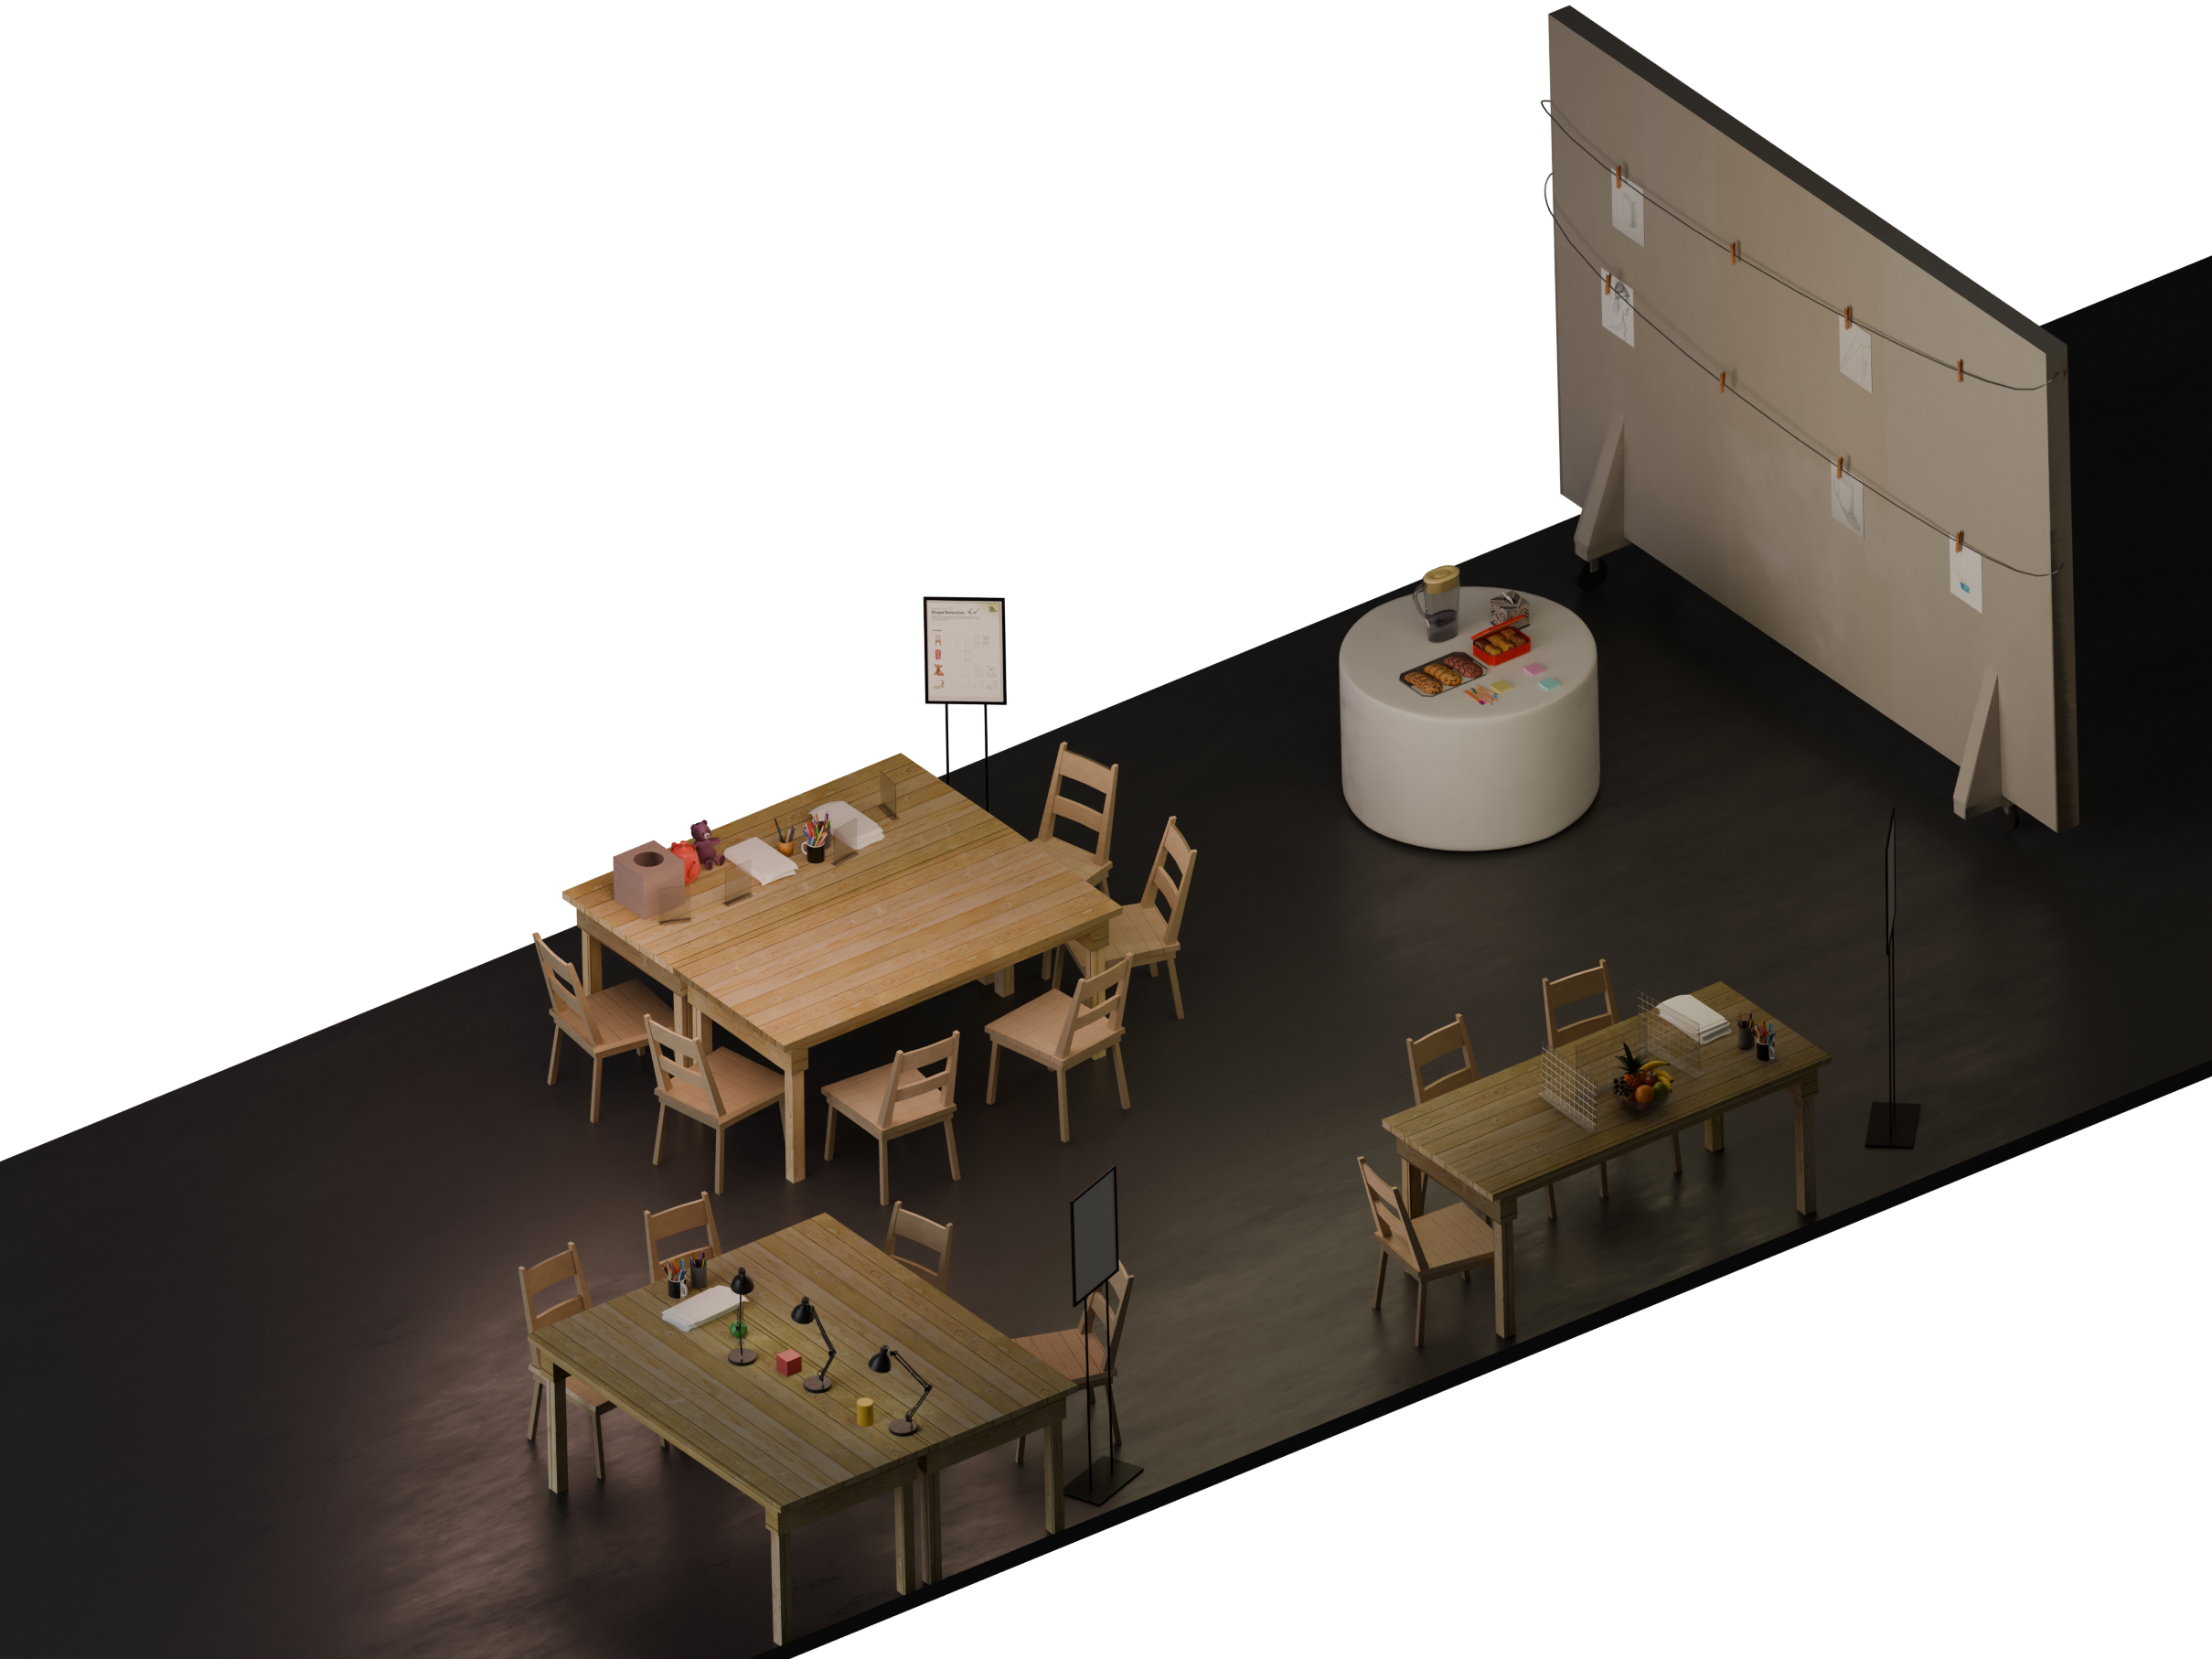
3D Visualization
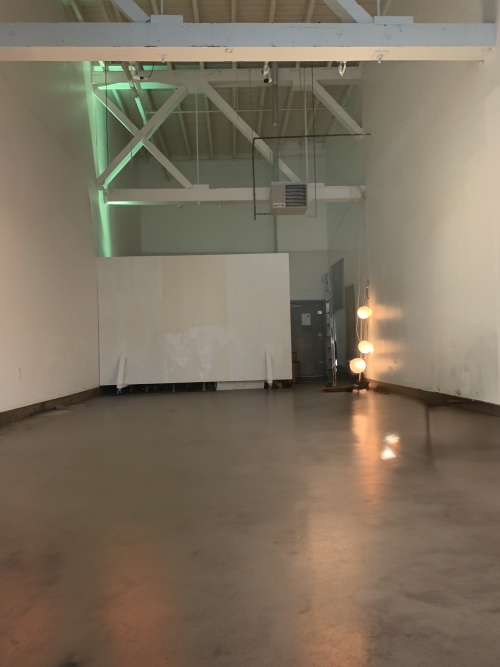
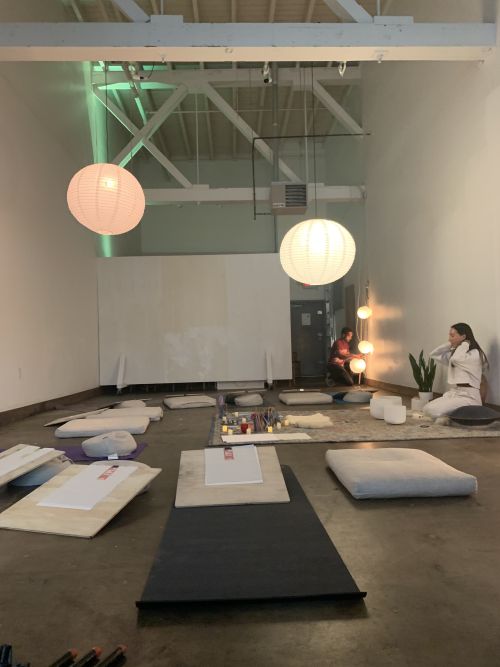
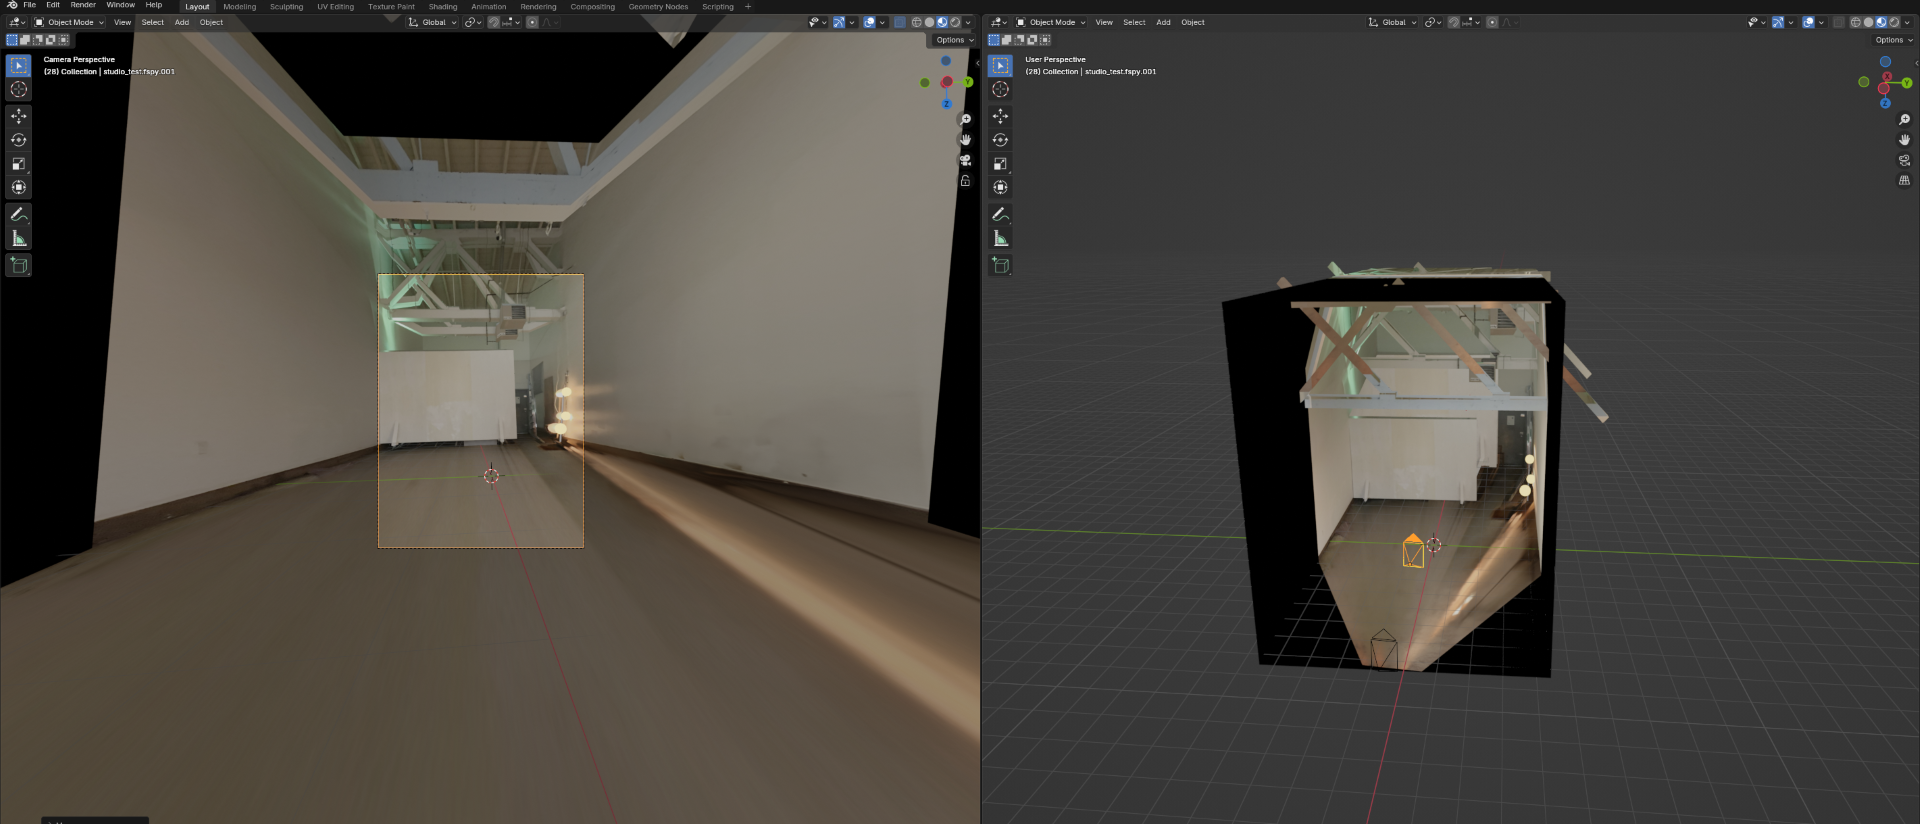
Once the team came up with the general concept for the Drawing Arcade, there were concerns about the method and the work required to present the idea sufficiently. Independently, I began creating a 3D model of the space our client frequently uses for their events using the images I took during our research phase. Figure 4 was the main photo I used as a base to start modelling the space due to its composition and how it featured the most identifiable parts of the place.
Note. If comparison between 2 images cannot be seen (e.g., pink selector is NOT in the center of the image), please REFRESH the page.
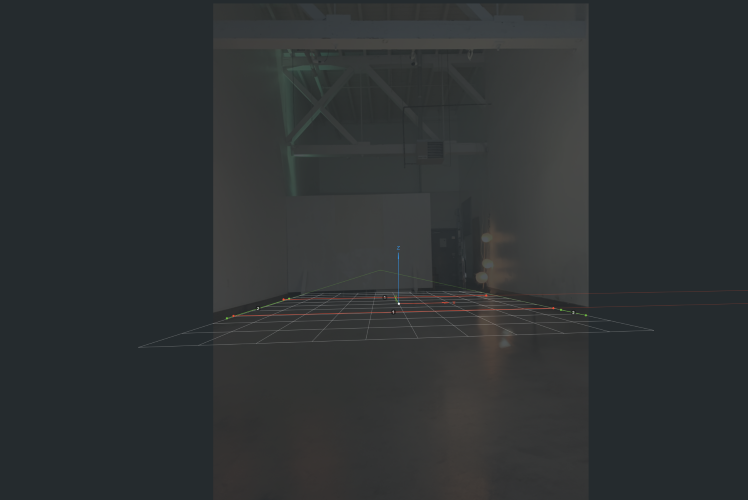
Upon importing the fSpy file as a camera into Blender, I modelled the major features found within the image. For my initial approach, I tried using camera projection to project the image from the camera onto the geometry of the scene. As can be seen in Figure 7, this approach did not work as intended, as there were still too many objects that disrupted how the image was projected and negatively impacted the ability to maneuver around the space as needed.
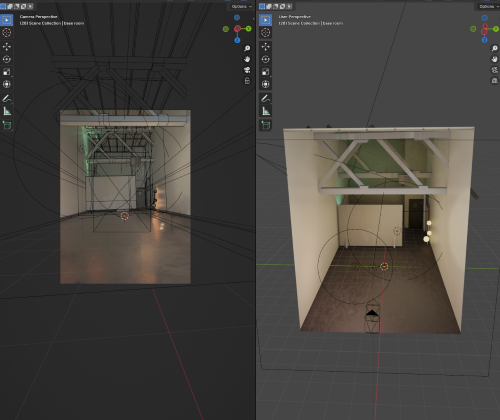
To correct this, the image was used as a texture upon which the UVs of the objects and features in the scene were projected to maintain accuracy with the image. Aside from those features, the other materials used were approximated to what could be observed from the image, resulting in the model seen in Figure 8.
The model was then populated with other objects needed for the workshop, such as tables and chairs, similar to those that the client had at their disposal. While I modelled the relatively simpler objects, the sheer volume of complex objects required them to be gathered from other sources like past projects, e.g., a teddy bear, or through Creative Commons assets from Sketchfab. Printed, written, and drawn materials were added later by using image planes and placed in the scene. As the people needed to be in specific poses in the scene, I opted to populate the scene with drawings of them rather than tinkering with human models. This resulted in the renders found in Figures 9 and 10.
Reflection
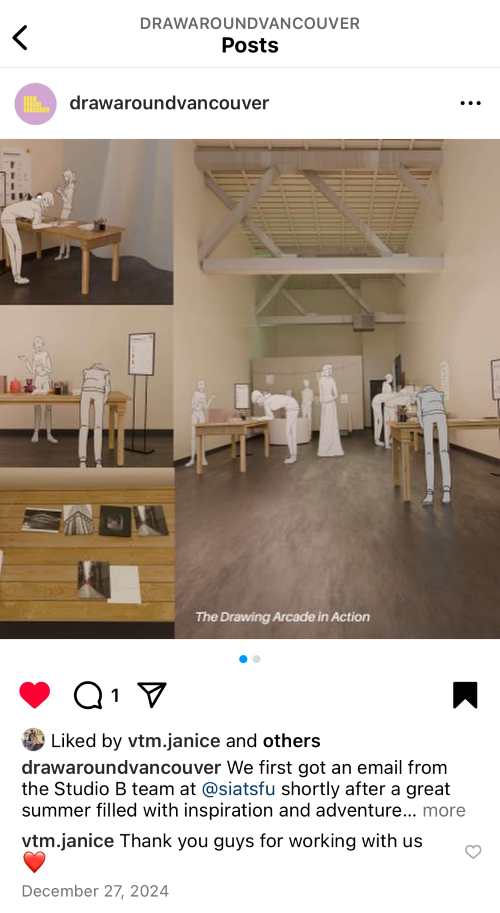
I consider this an important project as it was my first time working with a client who did not have a prior connection to any team members. While it was quite nerve-racking to establish that connection initially, it was rewarding to have a client as inviting, passionate about their business and responsive to the feedback as our client was. Seeing the client happy with the work we produced for them (Figure 11) was validating to see that our judgment of the team's quality of work was sufficient and that the work produced was valuable to the client.
References
- Draw Around Vancouver [@drawaroundvancouver]. (2024, December 27). We first got an email from the Studio B team at @siatsfu shortly after a great summer filled with inspiration and adventure. [Screenshot of Post]. Instagram. https://www.instagram.com/p/DEFxC58yY9I/?igsh=ZnA4b2E4ZXhqeHZ3&img_index=1
- Draw Around Vancouver [@drawaroundvancouver]. (2024, October 4). Community is the people who make you feel like you belong, who share in your experiences, and support you when you need it. [Screenshot from Reel]. Instagram. https://www.instagram.com/reel/DAy8koFBneq/?igsh=MWhzeDhwNWdkeDlqOQ==